Want to maximize muscle growth and strength? A weight training 4 day split targets different muscle groups each session, optimizing recovery and results. This article explains the benefits, how to create your workout plan, and offers sample routines to get you started.
Key Takeaways
-
A 4-day workout split offers balanced strength training and muscle growth while allowing adequate recovery time, making it ideal for busy schedules.
-
Whether you choose an Upper/Lower Split or Push/Pull Split, targeting major muscle groups comprehensively ensures balanced development and optimal strength gains.
-
Nutrition and proper rest days are essential for maximizing muscle gains, supporting recovery, and preventing injuries during a workout regimen.
Why Choose a 4-Day Split for Weight Training?
The four day workout split is a powerhouse method for anyone serious about strength training and muscle growth. Its structure offers balanced strength and total-body engagement while providing dynamic variety to keep your workouts exciting and effective. One of the main reasons for choosing a four day workout split is its ability to balance intensity with recovery, ensuring that you’re working hard without overtraining. This balance is crucial for preventing injuries and making consistent progress.
Intermediate lifters benefit from the simplicity and focus of a 4-day split, which stimulates muscle growth by targeting specific muscle groups with greater intensity. Each session in a 4-day split is designed to be effective, enjoyable, and efficient, making it easier to maintain consistency and stay motivated.
Another significant advantage of the 4-day split is its flexibility. It allows for adequate recovery time, which is essential for muscle repair and growth. Dividing the week into focused sessions ensures that missing a workout won’t disproportionately affect your overall training balance. This makes the 4-day split ideal for maintaining consistency and progress throughout the week.
Overall, the 4-day workout splits combine the benefits of training volume, muscle growth, and recovery for optimal results. It’s a time-efficient strategy that fits well with busy schedules, allowing you to maximize your time in the gym while achieving your fitness goals. The 4-day split is a versatile and highly effective approach, whether the goal is muscle building or balanced strength.
Designing Your 4-Day Workout Split
Begin designing your 4-day workout split by determining your fitness level and specific goals, whether it’s building muscle, increasing strength, or improving overall fitness. Aligning your workout routine with these goals ensures effective training. Consider your weekly schedule to create a feasible plan that accommodates recovery time and ensures consistency.
A well-structured 4-day workout splits targets all major muscle groups equally for balanced development. Common structures include the Upper/Lower Split, Push/Pull Split, and Body Part Split. Each of these splits offers unique benefits and can be tailored to your personal preferences and fitness goals. For instance, an Upper/Lower Split focuses on full-body strength training by alternating between upper and lower body workouts, while a Push/Pull Split alternates between pushing and pulling movements to optimize strength gains.
When choosing exercises, focus on those that target various major muscle groups for comprehensive training. A 4-day split program typically features exercises such as squats, deadlifts, and bench presses. It also includes rows and isolation movements like bicep curls and tricep extensions.
Determining sets and reps for each exercise is also fundamental; this can vary based on your fitness goals and training volume. Incorporating different training techniques within your split can enhance overall muscle engagement and keep your workouts challenging and effective.
Upper/Lower Body Split for Balanced Growth
An upper/lower body split is a fantastic approach for balanced muscle growth and a full body workout. This split is ideal for lifters seeking even body development and a balanced training regimen. By alternating between upper and lower body workouts, you can focus on specific muscle groups while allowing others to recover adequately. This method offers flexibility in scheduling rest days, fitting easily into various lifestyles.
The upper/lower split prioritizes form, controlled movement, and gradual progression for optimal results. However, it’s important to structure your workouts properly to avoid overlooking certain muscle groups and creating imbalances. A well-designed upper/lower split will enhance your training balance and allow time for additional cardio or accessory workouts.
Upper Body Day 1
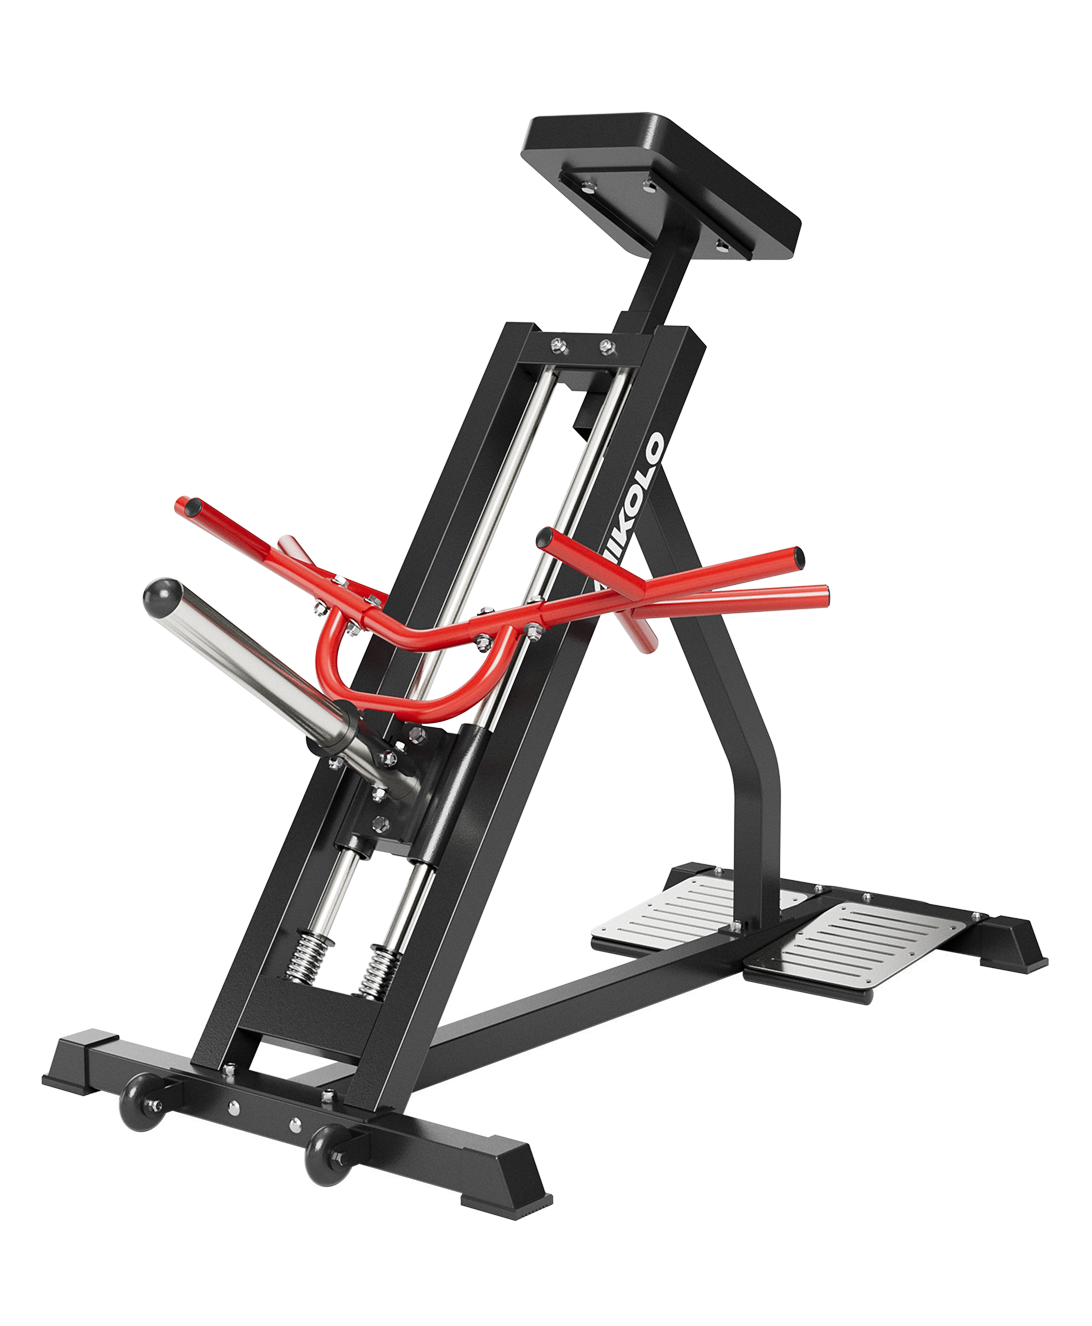
Upper Body Day 1 focuses on compound movements that engage multiple muscle groups for optimal upper body strength. This workout builds upon previous sessions to enhance volume and intensity, targeting the chest, shoulders, and back. Key exercises include T-bar rows for back volume, bench presses for chest development, and overhead presses for shoulder strength. These movements lay the foundation for a strong and balanced upper body.
Exercises like pull-ups and dumbbell bench presses further enhance muscle engagement and growth. Performing these exercises back to back increases the workout’s intensity and promotes muscle hypertrophy. Remember to focus on maintaining proper form and controlled movements to maximize the benefits of each exercise.
Lower Body Day 1
Lower Body Day 1 focuses on powerful movements for the lower body workout. The goal is to build strength and stability. Exercises like squats and leg presses work the quads and glutes, providing essential strength development for the lower body. These compound movements are crucial for building a solid foundation and enhancing overall leg strength.
In addition to compound movements, isolation exercises like leg curls can effectively target specific muscle areas, such as the hamstrings. Good mornings engage the entire posterior chain, including the lower back, hips, and hamstrings. This combination of exercises ensures comprehensive lower body development and strength.
Upper Body Day 2
Upper Body Day 2 includes a mix of pushing and pulling exercises to ensure a well-rounded approach to upper body training. Pushing movements such as the overhead press are essential for developing strength in the shoulder and triceps. These exercises promote comprehensive development of shoulder and arm muscles, enhancing overall upper body strength.
Incorporating pulling exercises like bicep curls is crucial for building arm strength and creating balance with pushing movements. Exercises such as dips and lateral raises further promote muscle growth and development, ensuring that all areas of the upper body are effectively targeted. This balanced approach helps in achieving a strong and aesthetic upper body.
Lower Body Day 2
Lower Body Day 2 focuses on engaging the core and lower body for stability and strength. Deadlifts are a key exercise, targeting the posterior chain and enhancing overall lower body strength. The main emphasis is to get strong at squats and deadlifts, ensuring comprehensive lower body development.
Exercises like good mornings strengthen the lower back, hips, and hamstrings, ensuring a balanced approach to lower body training. These exercises not only stimulate muscle growth but also improve core stability and overall functional strength. This comprehensive approach ensures balanced muscle development and strength in the lower body.
Push/Pull Split for Efficient Strength Training
The Push/Pull Split is an efficient method for strength training that alternates between pushing and pulling movements. This workout split focuses on upper body push, upper body pull, and leg exercises, setting it apart from splits that focus on specific body parts. By alternating movement patterns, it optimizes strength gains and provides comprehensive engagement of muscle groups.
This training method allows for varied workout routines and ensures that muscle groups recover adequately by not training the same muscles on consecutive days. Pulling exercises include movements targeting backward motions, such as rows, while pushing exercises focus on forward movements like bench presses. This balanced approach ensures effective strength training and muscle development.
Push Workout 1
Push Workout 1 centers around pressing movements to enhance upper body strength. These pushing movements primarily target the upper chest, shoulder muscles, and triceps for comprehensive development. Typical exercises include bench presses, overhead presses, and tricep extensions, which work together to build a strong and balanced upper body.
Incorporating these exercises in a structured manner ensures that all major muscle groups and different muscle groups are effectively targeted. Performing multiple sets of each exercise with proper form and controlled movements maximizes muscle engagement and growth. This approach helps in achieving significant strength gains and muscle hypertrophy.
Pull Workout 1
Pull Workout 1 predominantly emphasizes exercises that strengthen the back and biceps. Key exercises include deadlifts, rows, chin-ups, and bicep curls, which collectively enhance upper body strength and muscle development. Rows primarily target the upper back, brachialis, and forearms, providing comprehensive muscle engagement.
This workout effectively targets pulling muscles, promoting balanced muscle growth and strength. By incorporating a variety of pulling exercises, you can achieve significant improvements in back and bicep strength, contributing to overall upper body development.
Push Workout 2
Push Workout 2 focuses on exercises targeting the shoulders, quads, chest, triceps, and neck. The primary muscle groups targeted include shoulders, quads, chest, and triceps to enhance overall upper body and leg strength. Key exercises such as the overhead extension specifically target the long head of the triceps, promoting muscle growth and strength.
Performing these exercises consecutively in Push Workout 2 increases training volume for better muscle growth and strength. This structured approach ensures comprehensive engagement of the targeted muscle groups, leading to significant improvements in strength and hypertrophy.
Pull Workout 2
Pull Workout 2 focuses on vertical pulls, hamstrings, biceps, forearms, and neck. This workout ensures comprehensive engagement of both vertical and horizontal pulling muscles, promoting balanced muscle development. Key exercises include vertical pulls like pull-ups and isolation exercises such as bicep curls and forearm curls.
This balanced approach to pull workouts ensures that all major muscle groups are effectively targeted. Neck exercises can be swapped for other isolation exercises if preferred, allowing customization based on individual fitness goals. This flexibility ensures that the workout remains effective and enjoyable.
The Bro Split for Targeted Muscle Isolation
The Bro Split is the most popular 4-day workout split designed for muscle training. This method is recommended for gaining muscle and strength, focusing on one muscle group per day. The structure often includes a push/pull/legs routine with an extra arm day, allowing for high volume training of each muscle group. This approach facilitates focused workouts at a slower pace, promoting muscle hypertrophy by isolating single muscle groups during each session, making it a great example of day workout splits.
However, one criticism of the Bro Split is that it doesn’t train muscles often enough to optimize workout effectiveness. Despite this, it remains a popular choice for many lifters due to its simplicity and effectiveness in building muscle and strength.
Chest Day
Chest Day in the Bro Split is all about maximizing muscle growth and upper body strength through targeted exercises. Bench press is a key exercise, providing significant chest development and strength. Incorporating incline bench press further targets the upper chest, ensuring comprehensive muscle engagement.
Flyes enhance the pectoral muscles, contributing to overall chest aesthetics and strength. Focusing on these exercises with proper form and controlled movements ensures maximum muscle activation and growth. This targeted approach helps in building a strong and well-defined chest.
Back Day
Back Day is crucial for achieving complete back muscle development, enhancing overall strength and aesthetics. Deadlifts are a fundamental exercise for this purpose, providing significant back strength and development. These compound movements engage multiple muscle groups, contributing to overall upper body strength.
Incorporating exercises like rows and pull-ups further targets the back muscles, promoting balanced muscle growth and strength. Performing these exercises back to back ensures comprehensive engagement of the back muscles, leading to significant improvements in strength and aesthetics.
Leg Day
Leg Day focuses on building lower body strength and achieving muscular balance throughout the body. Key exercises include squats, good mornings, standing calf raises, and hanging leg raises. These compound movements are crucial for developing overall leg strength and muscle definition.
Back squats and hip thrusts build a solid foundation and enhance lower body strength. This comprehensive approach ensures that all major muscle groups in the lower body are effectively targeted, promoting balanced muscle growth and strength.
Arm Day
Arm Day in the Bro Split focuses on targeting specific muscle groups like the biceps, triceps, and forearms. Bicep curls are designed to enhance arm muscle size and strength, making them a key exercise for this day. Tricep dips are highly effective for increasing tricep strength and size, contributing to overall arm development.
Forearm curls effectively target the forearm muscles, ensuring balanced arm strength and development. Arm Day, with these exercises, offers a comprehensive approach to arm training, maximizing muscle growth and strength. This targeted approach ensures that all areas of the arms are effectively engaged and developed.
Importance of Rest Days in a 4-Day Split
Rest days are a critical component of any effective workout split, including a 4-day split. They allow muscles to recover, rebuild, and grow stronger, preventing overuse injuries and burnout. A rest day helps maintain motivation and reduces mental fatigue associated with intense training.
Skipping rest days can lead to overtraining, negatively impacting performance and increasing injury risk. Proper rest allows muscles time to heal and grow, maximizing muscle-building potential. Scheduling rest days can enhance workout flexibility, making your training routine more sustainable and enjoyable.
Rest days can be enhanced with active recovery activities. Walking, stretching, or practicing yoga are all beneficial options. Proper nutrition and hydration are also essential for muscle recovery, ensuring that your body has the necessary nutrients to repair and grow. Individual recovery needs may vary based on workout intensity, fitness level, and personal factors. Listening to your body and adjusting your rest days accordingly is crucial for long-term success.
Nutrition Tips for Maximizing Gains
Nutrition plays a vital role in maximizing muscle gains and supporting your workout routine. Consuming protein within 30 minutes to two hours post-exercise is essential for muscle recovery and replenishing energy stores. Carbohydrates should comprise 45% to 65% of your daily caloric intake to support energy levels during high-intensity workouts.
A balanced intake of carbohydrates, protein, and healthy fats is crucial for optimizing workout performance and recovery. Hydration is also essential, with daily fluid intake recommended to be approximately half of your body weight in ounces to maintain optimal performance. Proper nutrition and hydration provide the necessary nutrients to support muscle growth and recovery.
Progression and Adjustments for Continued Improvement
Progressive overload is a fundamental principle for continued improvement in strength training and resistance training. It involves gradually increasing workout intensity to maximize strength and muscle gains. Successful progression helps in avoiding training plateaus where no further muscle growth is observed.
Limit increases in weight or intensity to no more than 10% per week to prevent injury. Listening to your body is crucial; if you experience fatigue or pain, adjustments should be made to ensure safe and effective training. This approach helps in maintaining consistent progress while minimizing the risk of injuries.
Summary
In summary, a well-designed 4-day split workout can be a highly effective method for building muscle, increasing strength, and achieving a balanced physique. By focusing on specific muscle groups with targeted exercises and allowing adequate recovery time, you can optimize your training and see consistent progress. The importance of rest days, proper nutrition, and progressive overload cannot be overstated in this journey.
Remember that consistency and dedication are key to achieving your fitness goals. By following the guidelines provided in this blog post, you can create a workout routine that fits your lifestyle and maximizes your gains. Start your 4-day split routine today and take the first step towards a stronger, healthier, and more balanced you!
Frequently Asked Questions
What is a 4-day workout split?
A 4-day workout split focuses your workouts on different muscle groups across four days, helping you build strength while giving each group enough recovery time. It's a great way to ensure a balanced training routine!
How should I structure my 4-day workout split?
A great way to structure your 4-day workout split is by using either an Upper/Lower Split or a Push/Pull Split, depending on your goals. Choose what feels right for you, and make sure to balance the muscle groups you're targeting each session.
Why are rest days important in a 4-day workout split?
Rest days are essential because they help your muscles recover and grow stronger while preventing injuries and burnout. Giving yourself that time off keeps you motivated and ready for your next workout!
What should I eat to maximize my gains?
To maximize your gains, focus on a balanced diet with carbs, protein, and healthy fats, and make sure to eat protein after your workouts. Staying hydrated is key for muscle growth, too!
How do I continue to see progress in my workouts?
To keep seeing progress in your workouts, focus on progressive overload by gradually increasing intensity, and always listen to your body to make adjustments as needed. This approach will help you break through plateaus and maintain consistent improvement.
























Leave a comment
This site is protected by hCaptcha and the hCaptcha Privacy Policy and Terms of Service apply.